
Waterproof Cap Maker: The Ultimate Guide to Choosing and Using One
2026-09-24
Ever watched a brand-new cap turn into a soggy mess after one drizzle? The problem usually isn't the fabric—it's the maker. This guide walks you through choosing a waterproof cap maker that handles technical materials without skipping a stitch, plus the techniques that make all the difference. For gear that actually delivers, check out 4ugear.
Where Waterproofing Actually Happens on a Cap
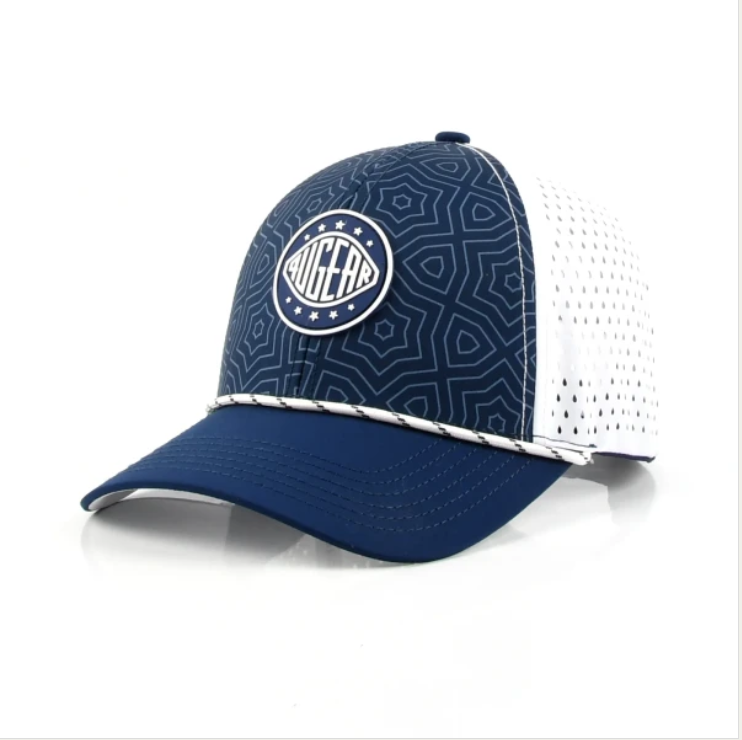
Most folks assume a cap's waterproofing comes from the shell fabric, but the real work happens at the seams and along the brim edge. Needle holes and stitched channels are the first places water sneaks through, so better caps use taped seams or bonded overlays there, while the brim itself often gets a hidden membrane or a waxed insert rather than just a surface spray.
The crown is another trouble spot, especially where the panels meet at the top button. Water tends to pool in that center dip before running off, so that junction usually receives an extra dose of water-repellent treatment. Interestingly, this is also where most caps start to fail after repeated wet-dry cycles, because the coating breaks down under constant flexing.
Don't overlook the sweatband area. Rain rolls off the brim and collects right at the forehead contact line, then wicks backward into the inner lining. Some designs extend a waterproof barrier behind the sweatband or use a quick-drying mesh that keeps that zone from becoming a soggy sponge.
Matching the Machine to Your Fabric and Crown Shape
Different fabrics put very different demands on your machine. Lightweight materials like silk, organza, or fine cotton need a machine that can handle a fine needle plate and low presser foot pressure to avoid puckering, while heavy denim, canvas, or leather requires a stronger motor and a walking foot to move layers evenly. If your crown shape involves multiple layers or curved seams—common in structured hats—look for adjustable presser foot height and, ideally, a free arm for tight curves.
Crown shape matters just as much as fabric weight. A shallow, flat crown can be sewn on almost any domestic machine, but a tall, domed crown with stiff interfacing will push feed dogs and clearance to their limit. Before buying, test the machine's maximum clearance under the presser foot; you'll often need at least 12–15 mm to fit a brim plus crown layers. For unusual crown profiles like pointed or asymmetrical shapes, a machine with needle position control and a narrow feed dog area gives you more room to pivot without distortion.
Don't ignore stitch quality on the exact fabric you plan to use. Bring swatches of your actual crown material and run a few test seams before committing. Check that the machine can maintain even tension on stretch or bias-cut crown pieces without distorting the shape. Some machines add automatic tension adjustment, but on textured or slippery fabrics manual tweaks usually beat presets.
Separating Useful Specs from Marketing Noise
Spec sheets are rarely written to help you make a confident decision. They are built to sell. That means every number, every acronym, every carefully worded claim is placed there to shape your perception, not to clarify what the product actually does. Once you recognize this, the real work begins: figuring out which figures translate into daily use and which ones exist only to impress on a sales page.
A useful spec answers a practical question. How long will this last under normal load? Will it fit in the space I have? Can it handle the tasks I actually perform, not the ones a benchmark suite dreams up? A noisy spec, by contrast, leans on extremes: maximum theoretical speeds, laboratory brightness levels, connectivity standards that no current device supports. None of these are lies, but none of them reflect what you will experience on a Tuesday afternoon.
The trick is to ignore the headline number and ask what changed underneath it. A faster processor only matters if the software you use can take advantage of it. A higher resolution screen only helps if your content is rendered at that resolution. Once you start treating specs as clues rather than verdicts, the marketing fog lifts, and the product's actual value becomes visible.
Setting Up Your First Run Without Guesswork
Before you hit the start button, write down the exact distance, pace, and route you plan to follow. This tiny bit of forethought removes the usual internal debate about whether to push harder or cut things short. When your watch beeps and your shoes are laced, there is no guessing left — only execution.
Set aside ten minutes the night before to check the weather, lay out your gear, and charge your earbuds. These small actions create a predictable starting point, so the morning does not become a scramble of forgotten items or second-guessing. The fewer decisions you make after waking up, the smoother your first run will feel.
During the run itself, resist the urge to adjust your plan on the fly. If you planned an easy three miles, keep the effort conversational even when you feel strong. The goal of a first run is not to set a record but to build trust in your own preparation. Follow the plan as written, and you will finish knowing exactly what worked and what needs tweaking next time.
Troubleshooting Weak Seams, Bubbles, and Thin Coats
Weak seams, bubbles, and thin coats rarely show up in isolation. More often than not, they point back to a handful of shared culprits: surface preparation gaps, inconsistent material temperatures, or uneven application speed. Before tweaking one variable, wipe down a test panel and check how the material flows. Look for residue, moisture, or uneven roughness across the substrate. It helps to run a quick pass with the same settings on a known-clean surface—this will tell you whether the issue is coming from the material or the equipment.
Bubbles usually mean something is trapped under the coating. It could be moisture in the substrate, solvent flashing off too fast, or air being pulled in through a worn seal. Thin coats, on the other hand, often happen when the gun moves too quickly, the distance is off, or the viscosity has drifted lower than the spec sheet allows. Weak seams tend to appear where adjacent passes don't overlap enough or where the material starts to set before the next pass can fuse with it. Work through each variable one at a time—change the speed, check the temperature, verify the viscosity—and keep a short log of what you adjusted.
Prevention is less about memorizing fixes and more about building a quick routine. A simple checklist at the start of each shift can catch most of these issues before they reach the finished part: inspect surface cleanliness, confirm line speed and temperature settings, and run a test coupon through the process. If operators learn to recognize the early signs—a slight haze, a pinhole, a line that looks too straight—they can correct course without a full shutdown. Keep the equipment seals and filters clean, and don't let small deviations become habits.
Maintaining the Maker for Consistent Results Over Time
A machine that gets a quick wipe only when something spills will slowly drift out of spec. The drop is rarely dramatic on day one. It shows up weeks later as a faint off-note in the output, a slightly longer warm-up, or a small inconsistency you cannot quite name. Keeping a maker performing the same way next month as it did today starts with a simple habit: clean the contact points, clear the residue, and check the parts that flex or heat with every use.
What most people overlook is that stable results come from stable conditions. Hard water buildup, dust around the seals, or a loose fitting can change how the maker behaves long before it fails outright. A five-minute check every couple of weeks, using the manufacturer’s suggested cleaning method, does more than prevent breakdowns. It preserves the timing, pressure, and temperature that produce the result you originally bought the machine for.
Records also help. Instead of guessing when the last descale or filter swap happened, keep a short note taped nearby or saved on a phone. When results start to shift, you can match the change to a maintenance gap rather than blaming the beans, the ingredients, or your own technique. Consistency is not a setting you dial in once. It is the sum of small, repeated acts that keep the maker inside its original working window.
FAQ
Pay attention to the heating plate size and whether it can handle curved brims without leaving uneven spots. A model with adjustable pressure and a digital temperature readout will save you from guessing. Also check if the machine accepts seam-sealing tape attachments, because the stitching is where most leaks start.
Start by applying a thin layer of waterproof adhesive or tape along the inside seams before pressing. Then place the cap on the form, set the temperature to match your fabric, and press for around 15 to 30 seconds. After it cools, spray the outside with a durable water repellent and let it cure for 24 hours.
You can improve almost any cap, but tightly woven polyester or nylon works best. Cotton absorbs moisture and will need extra coating, which can make the cap stiff. For true waterproofing, use laminated fabrics or caps that already have a waterproof membrane.
A standard cap press focuses on heat transfers and shaping. A waterproof cap maker has a sealed heating element and often includes attachments for applying seam tape or edge sealant. It also runs at lower temperatures for longer dwell times so the waterproof layer bonds without scorching the fabric.
Wipe down the heating plates after every session to remove adhesive residue. Every month, check the pressure springs and lubricate the hinge points. If you use liquid sealants, run a dummy pressing cycle with a cloth to clear any buildup from the steam vents.
A big one is using too much heat, which melts the waterproof membrane and leaves shiny patches. Another is skipping the seam tape and relying only on spray, which leaks after a few wears. People also forget to pre-shrink fabric, so the cap warps after its first wash.
With proper sealing and a quality outer spray, expect about 20 to 30 washes before the water repellency fades. Seam tape can last the life of the cap if applied correctly. You can restore the outer coating with a quick re-spray and low-heat tumble dry.
Applying seam tape after sewing is more practical for small production, because you can press each panel flat and then seal the stitches from the inside. If you have flat-pattern pieces, pre-laminating them before cutting works well, but then you need to seal the needle holes afterward anyway.
Conclusion
A waterproof cap maker only earns its place on your bench if you understand that the real sealing happens at the stitch lines, brim edges, and fabric weave, not just on the outer shell. Before touching a dial, look closely at where water will sneak in: curved crown seams, the gap around a stiff brim, and any laminated panels that flex. Match the machine's roller pressure or spray pattern to what the cap demands—soft cotton twill needs a different feed and dwell time than a molded polyester crown, and a high-profile shape rarely behaves like a shallow five-panel. Ignore inflated wattage and "industrial" labels; a useful spec is adjustable temperature or nozzle width that fits your actual seam geometry, not a spec sheet written for a different product.
For your first run, cut a single test panel and start with the lowest workable heat and speed, then note how the coating sinks into stitching instead of bridging over it. If you see bubbles, thin patches, or weak seams, trace it back to uneven tension, dried residue in the nozzle, or a crown that shifted mid-pass—not always the material. Keep the maker clean after every batch: flush the applicator, wipe the guides, and store the temperature probe away from moisture. A log of settings per fabric, even handwritten, will beat guessing and keep the finish consistent from one run to the next.
Contact Us
Contact Person: Tommy
Email: [email protected]
Tel/WhatsApp: 8613546956008
Website: https://www.4ugearsupply.com/